The Back Story
Now that our son is 3 months old we decided that he was ready to graduate from the checker board pattern to more advanced geometric shapes. We also decided to add some color. In my wife’s college human development class, she learned that when babies are first born they can only see black, white and red. The checker board pattern that we made was just black and white, this one will be red and black, and instead of just squares we have rectangles, circles and chevrons.
Baby Art 2.0
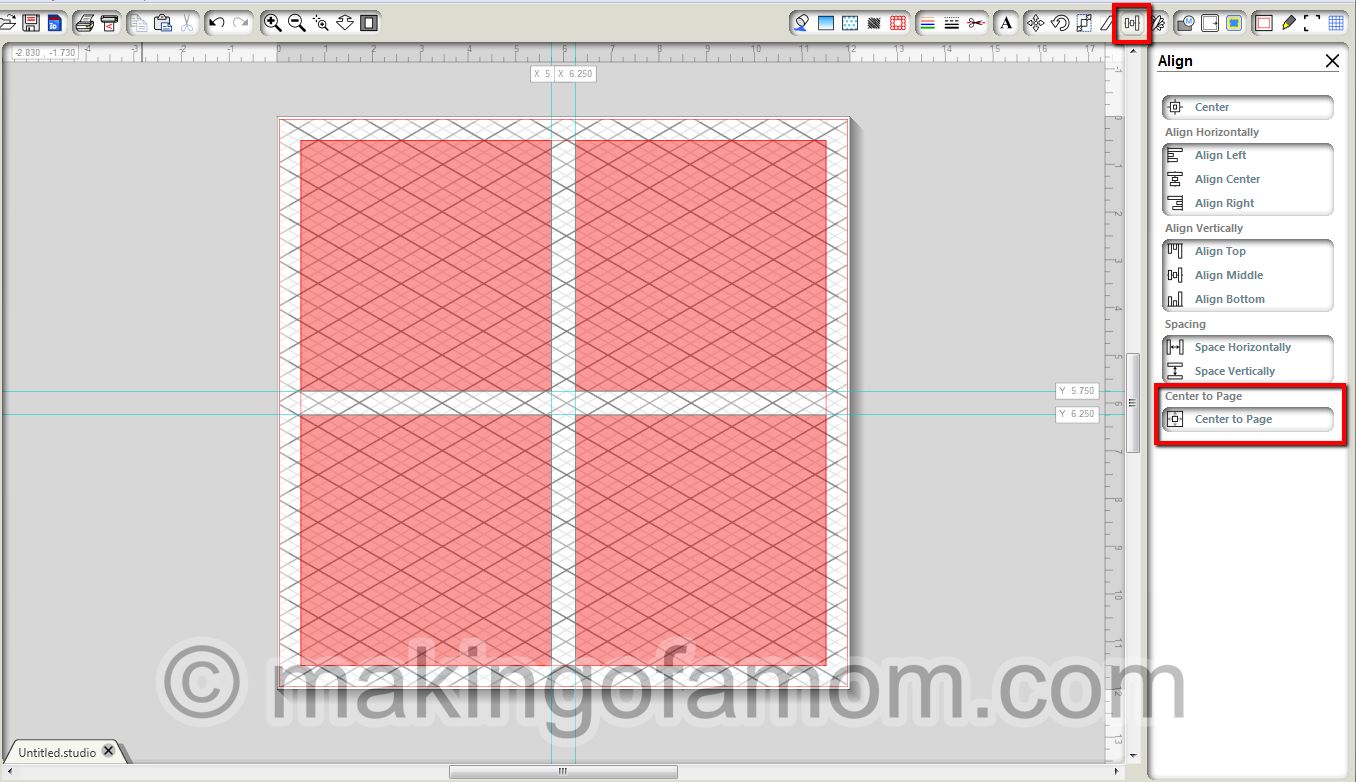
We have made baby art for our other two kids but we had to do all the cutting by hand or with punches, but with the Silhouette I can design everything in Silhouette Studio, click a button and have the Cameo do all the cutting. First I made an 11 inch x 11 inch square and centered it on the page. Then I made four 5.25 inch x 5.25 inch squares and put them in the four corners of the 11 x 11 square. Each small square would have its own design.
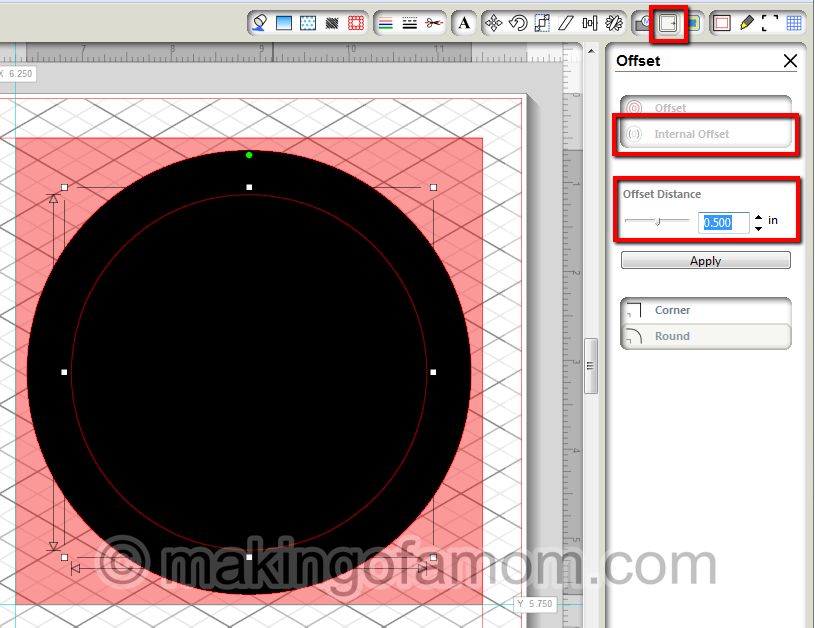
Starting withe the top right square I decided to do a circles on circles pattern. The biggest circle is 5 inch x 5 inch, it is centered inside the square.
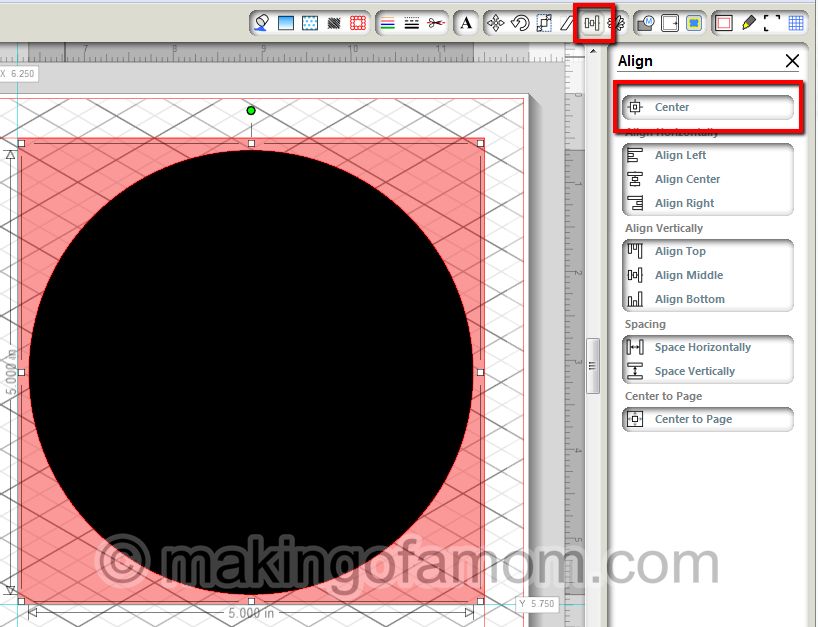
I found the easiest way to make smaller circles that are centered in big circle is to use the Offset Tool. To use the Offset Tool, select circle and under the Offset Tool menu click the Internal Offset opinion. The default Offset Distance is 0.040 inch, I changed that to 0.5 inch. Then I would do that with each smaller circle until the smallest circle was 2 inch x 2 inch.

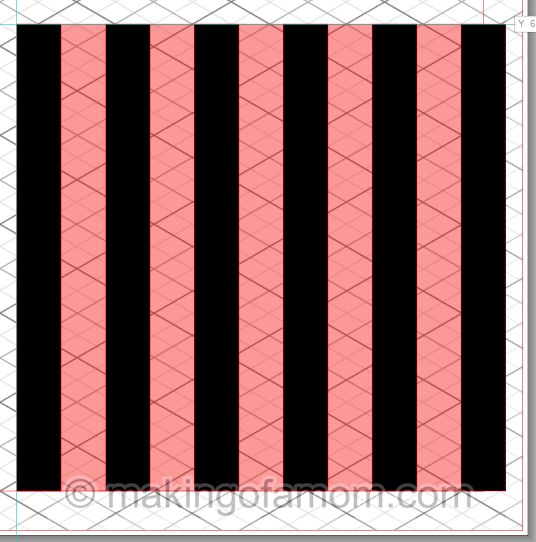
For the square with stripes I made a 5.25 inch x 0.5 inch rectangle and I put it on the far left of the square. Then using the Replicate Tools I use the Duplicate Right to make stripes all the way across the square. In order to just have it cut stripes, select every other stripe and delete them.

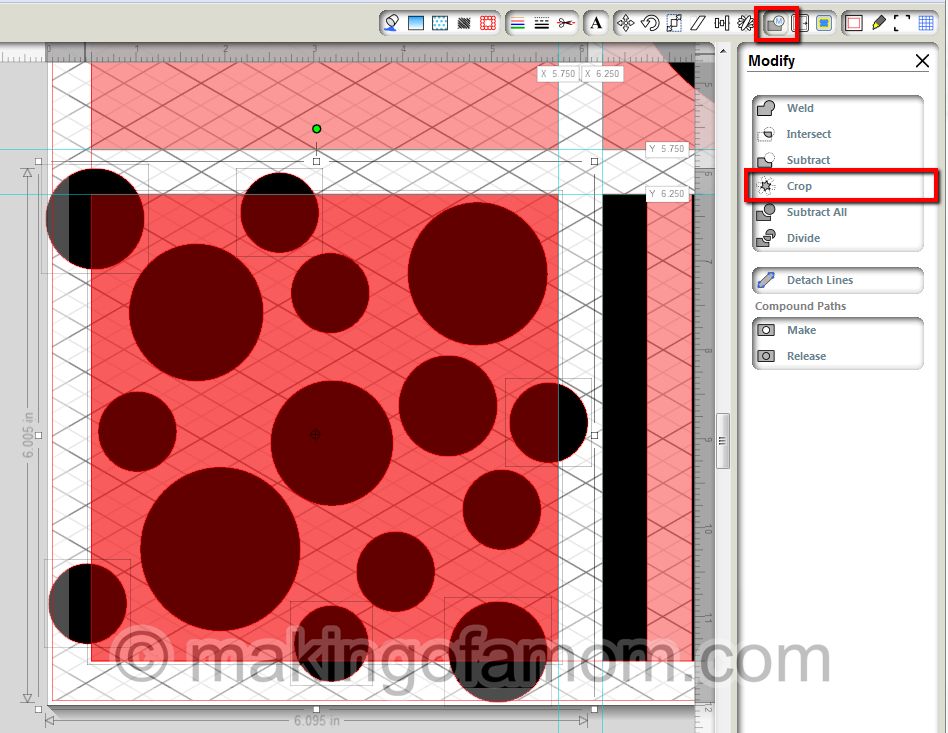
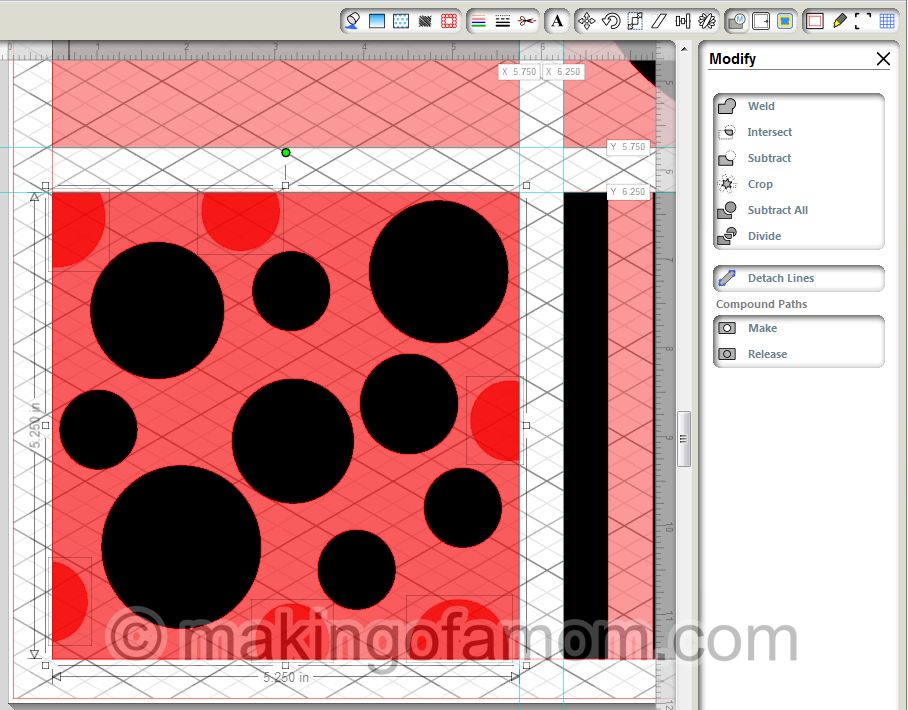
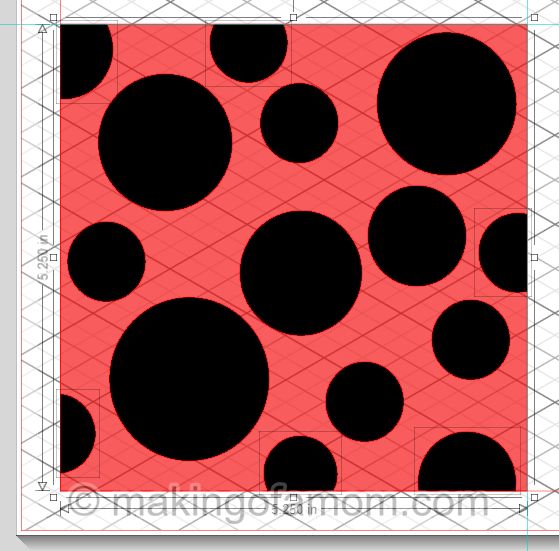
For the polka dot square I just made a whole bunch of different sized circles and spread them around the square. To make a circle with a flat side, place circles on the edge of the square, while holding down the Shift key click on the square and each circle on the edge of the square, then use the Modify Tool and Crop. All of the circle pieces outside the square should be cut off. (If you want to keep the big square after cropping you have to make a duplicate of the square by pressing Ctrl+d after selecting the square. The new square will be shifted to the right slightly so you can select both squares and use Align Right to get them lined up on top of each other)
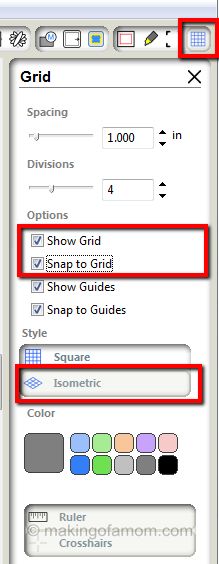
The chevron square took the most work but I figured out an easy way to do it. Under the Grid Setting check Show Grid and Snap to Grid, and under Style click Isometric.
I used the Draw Polygon tool to draw the chevron pattern. (if you have a square shape blocking the Grid go to the Fill Color Tool, at the bottom click Advanced Options and change the Transparency setting to anything greater than 0%) Starting on the left side near the top I started drawing the pattern following the Grid lines and allowing the line points to snap to the Grid.
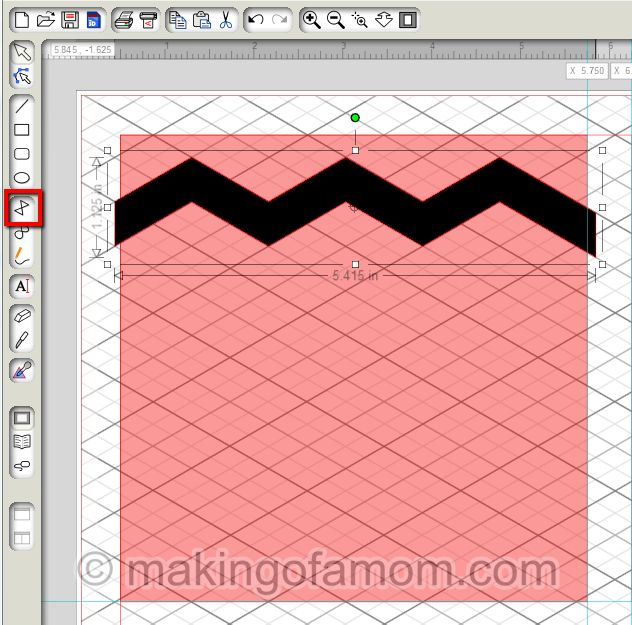
You can draw the rest of the chevron lines all the way down the square or you could just copy and paste them.
![]()
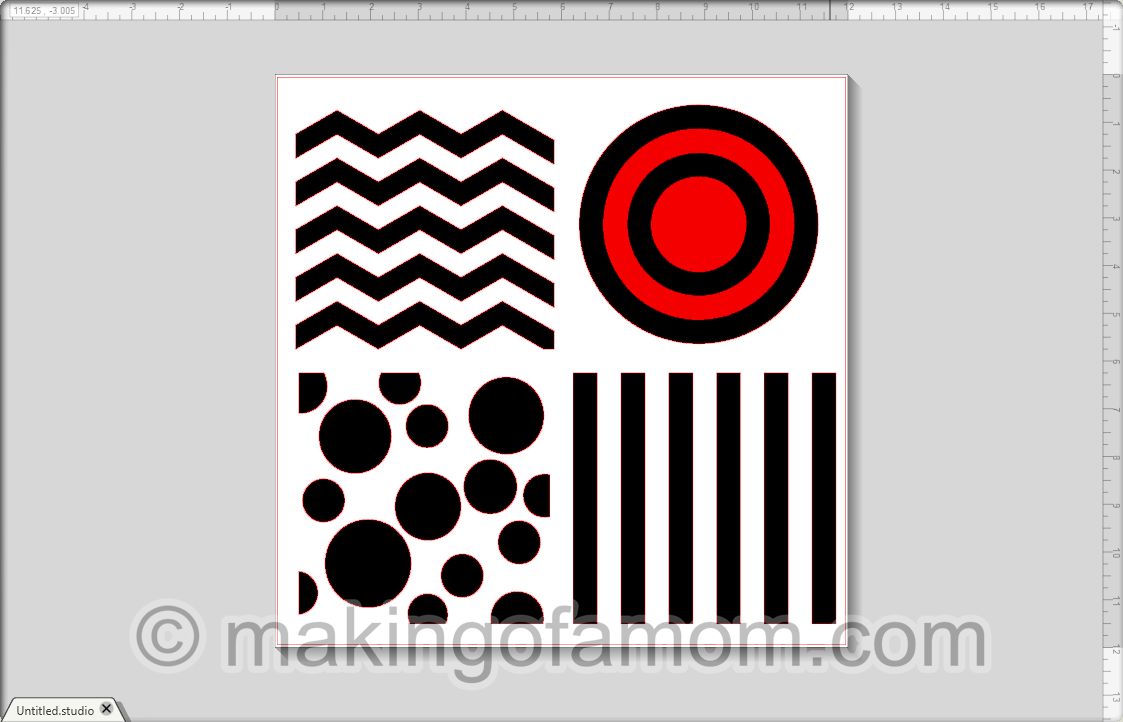
I added the 11 x 11 square and the four 5.25 x 5.25 squares for visual and spacing purposes and if you did too they need to be deleted otherwise the Silhouette will cut those out too. This is what the finish design looks like in Silhouette Studio.
Here is what it looks like when it is all cut out.
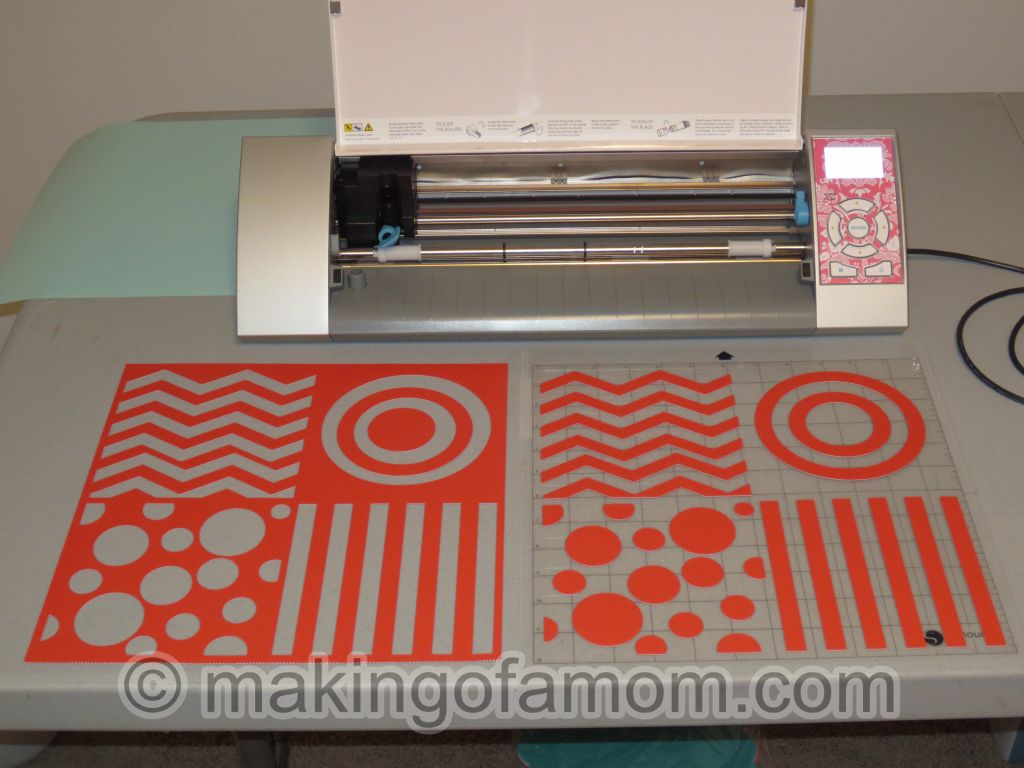
Side Note: I learned this the hard way, make sure you double check the load settings on your Silhouette before you load the cutting mat. The previous project to this one I had it set on load media and not load cutting mat, so when I started cutting out this project the Silhouette started cutting the top of the cutting mat. So double check your load settings
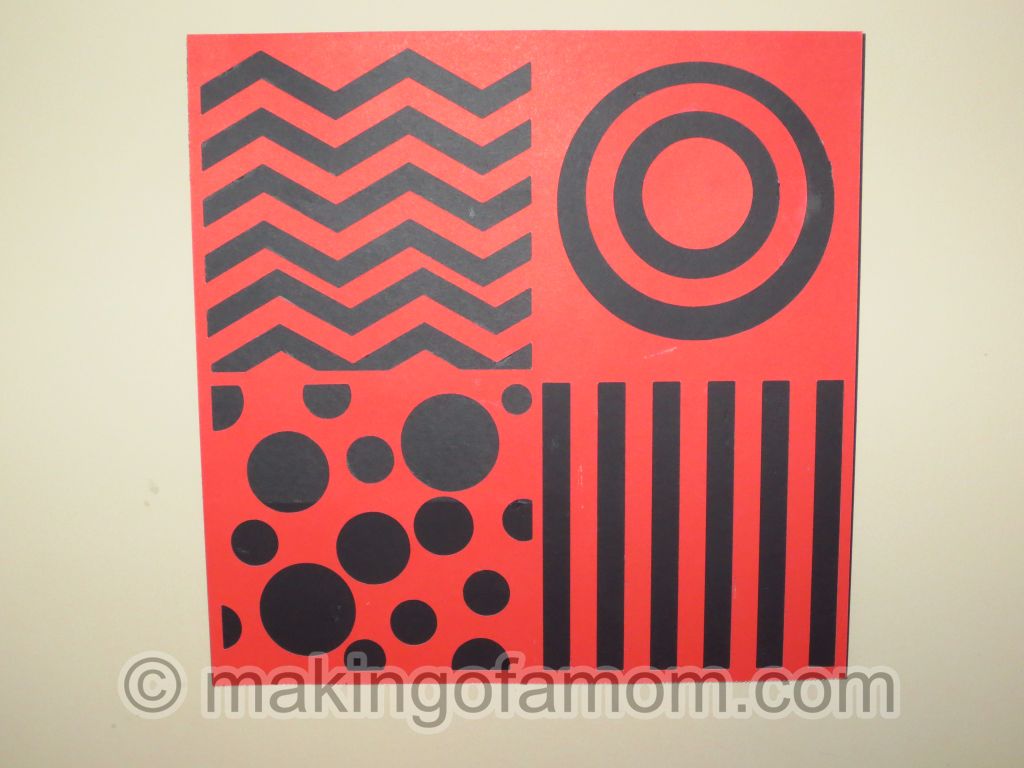
Here is what the final project looks like hanging on the wall.

HELP? I need to find a better glue to use on paper projects. I used a regular school glue stick to glue this together and I was doing it on some newspaper which resulted in some of the paper getting stuck to the front of the project. So if you have any suggestions let me know in the comments.
Here is the download for the cut file.
![]()
Last week’s tutorial was how to make a Fan-tashe-tic Birthday Card.
The Silhouette store often has bundle sales with the CAMEO and Portrait and their special materials. Visit the store and enter discount code MAKING to get a great sale price!!
Have an idea for a project you would like to see as a tutorial, leave your idea as a comment or send an email.


[…] The last tutorial was how to make a Baby Art 2.0. […]