Part of the May Silhouette promotion includes clear sticker paper. Thinking of a cute craft to make with clear sticker paper, besides labels, is harder than you think. While my wife and I were brainstorming we came up with a cute idea to decorate our cell phone cases. My wife has a cheap case on hers that is a solid color so we thought it would be fun to add some design to it. We also decided to get a couple more cheap cases (seriously, they are like $1.87 on Amazon) and made several different designs to jazz up the cases. Now whatever mood we are in, we have a case to compliment it.

I love that you can use your home printer to print onto the clear sticker paper, but one thing we noticed was using the Glossy Photo paper setting on the printer produces better results.
The great thing about using clear sticker paper is that you only see your printed design and not the sticker paper itself. I cut things out two different ways: 1) cutting out a large rectangle and 2) cut out the shape. For the chevrons, rainbow polka dots and the panda bear I cut out a rectangle that would fit below the camera hole and before the edges started to curve.

On the storm trooper helmet I just cut out the shape of the helmet like a normal sticker.

Silhouette Studio makes it real easy to do this. Click the shape that you want to cut out (in this case the helmet) and then click on the Offset Window button. Click the Offset option and it will create a shape slightly bigger than the one you had selected. If you want the new shape to be bigger or smaller adjust the Distance slider until you find the desired size.

I really like the new cut by line color option in the 3.0 version of Silhouette Studio, just make sure that you have the right material selected for the line color you want to cut out. When I made my first cut for this project I went through and unchecked all the colors I didn’t want to cut that then picked Clear Sticker Paper for my material. After the cut finished the shapes weren’t cut out all the way, then I looked back at my cut setting and saw that I had picked sticker paper for one of the line colors I wasn’t using so I had to put the right material on on the right line color and the set the silhouette to the right blade setting and everything cut out fine.
Looking at the results, cutting out the shape rather than a big rectangle looks better unless you are doing a design like the polka dots. You can fit so many designs on one sheet of sticker paper you can print and cut a whole bunch and since they are just stickers you can peel them off and trade them out as often as you want.
We got the chevron pattern, rainbow polka dots and the panda bear from the Silhouette Store.

Top 3 things I learned from this project
- When printing on Clear Sticker Paper use the Glossy Photo Paper setting on your printer
- Make sure your cutting mat is sticky enough to hold the sticker paper (our mat is well used and the bottom of the sheet was not fully secure so when the silhouette was cutting at the bottom of the sheet, it slipped and cut the design in half)
- Make sure the cut lines for your design are inside the Registration Marks or else the silhouette will not cut those parts. In the picture below all the red lines are out side the registration marks (the blue box) and were not cut.

Check out all the cover we made.
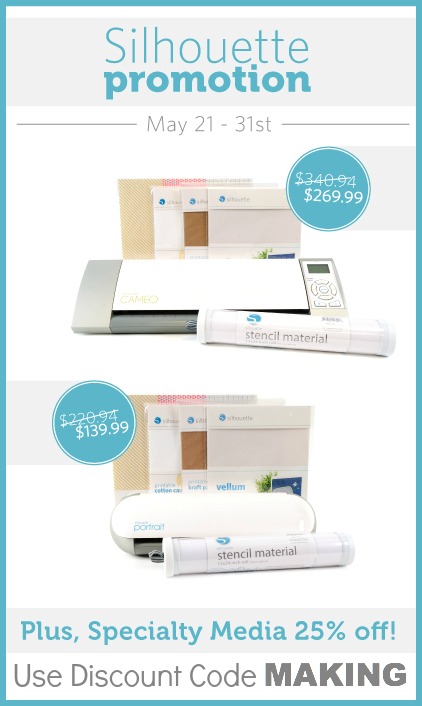
 With the May Promotion you can get this clear sticker paper and other fun specialty for 25% off. Silhouette is also offering some awesome bundle deals:
Silhouette Portrait
Sale: $139.99
To check out my other Silhouette CAMEO and Portrait tutorials, visit my Pinterest board:
Follow Stefanie Cornwall’s board Silhouette Tutorials on Pinterest.


Donna Hup says
No way!! I have a Silhouette (and love it)! I know what this weekend’s project will be 🙂
Thank you so much for the tutorial!
amee says
I would have never thought of doing this. It would great to make a sticker for my child’s ipod.
Addi says
The phone cases turned out so cute!
Sarah says
What a great idea! I could get addicted to making these I’m sure, uh oh. 🙂
Ashton says
I’m not that much of a online reader to be honest
but your blogs really nice, keep it up! I’ll go ahead and bookmark your site to come back in the future.
Cheers