I recently saw somewhere on the internet (I’m sooo observant!) that you could make your very own watering can from things you have at home! SCORE! Since my watering can broke about 2 years ago and I haven’t bought a new one yet (I’m cheap!) I do desperately need one though. A couple of days ago I went out to water my pretty daffodils (which have all now died by the way, I’m a plant killer, not on purpose I might add. Hopefully next year they will come up stronger than this year and decide to live with the crazy lady that is watering them!) Back to my story, a couple days ago I went  to water the plants by using a juice pitcher and a cereal Tupperware holder thing (without the lid.) That was a big mistake, I ended up soaked as I tried to carefully navigate down 4 steps with an open container brimming with water. Since then I have been forcing everyone to drink a lot of milk so I could make my own watering jug! Want directions? Ok here we go! What you need:
- Empty Milk Jug
- Philips head screwdriver
- Sheer brute strength 🙂
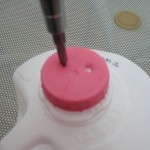
 With your cleaned out, empty milk jug on a table, make sure the lid is screwed on tight. Get your Philips head screwdriver and push a hole through the lid. It isn’t too hard actually. Make sure you spin the screwdriver around to make the hole nice and open so the
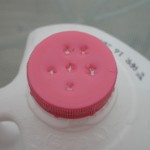
  water can flow! Make as many holes as your heart desires. I ended to spin my screwdriver in the holes a couple of times to make them open up enough for the water to flow. Also, the more holes the better is what I found!
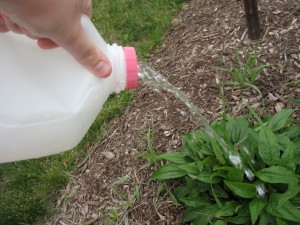
 Now mine isn’t perfect, and yours very well might end up better than mine, but the point is you get what you pay for (it’s FREE so that’s how good it is going to be) and I’m recycling a milk jug. We recycle anyway, but this was is recycling and reusing! It’s upcycling! SCORE! Join me in this step to being green and make a homemade watering can!
